Contact Details
Website: techextension.com Store :store.techextension.com
Email: support@techextension.com Skype: tech.extension
Product Page: SuiteCRM Digium SwitchVox CTI Integration
SuiteCRM Versions:
6.1.x 6.4.x 6.5.x 6.6.x 6.7.x , 7.x
Prerequisite
- Cent OS based Linux server with with php 5.6 or higher version
- JRE 1.7 or higher version should be installed on Server.
- Require port tcp 9898 and 8082 open on Server.
- Support Soft phone or Sip based hard Phone.
- There should be connectivity between this server and pbx server.
- Please make back up of data of crm and pbx and also crm folder before Installation.
Install following packages
pear install XML_Serializer-0.19.2
pecl install pecl_http
yum install php-pecl-apcu
sudo yum install php-raphf
sudo yum install php-propro
pecl install pecl_http-1.7.6
http://developers.digium.com/switchvox/?pageView=phpLibrary
# yum install php-gd php-imap php-ldap php-odbc php-mbstring php-pear php-xml php-xmlrpc php-soap
# yum install curl curl-devel perl-libwww-perl ImageMagick libxml2 libxml2-devel
Installation Steps
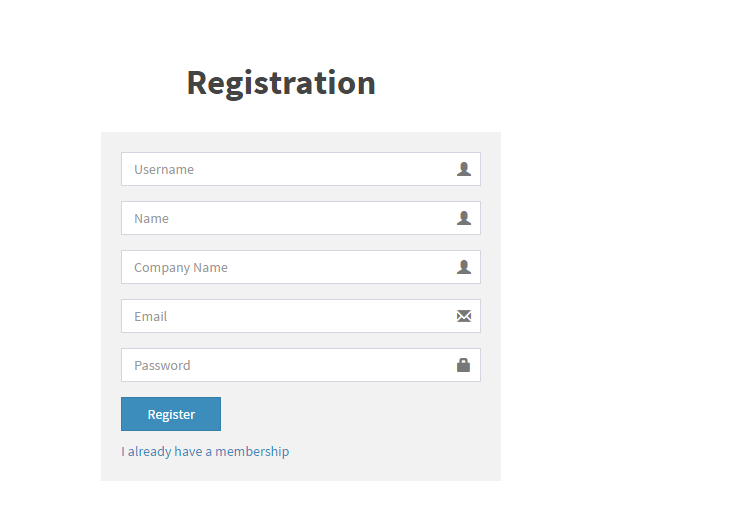
Create Account On Our Portal https://license.techextension.com/register.php
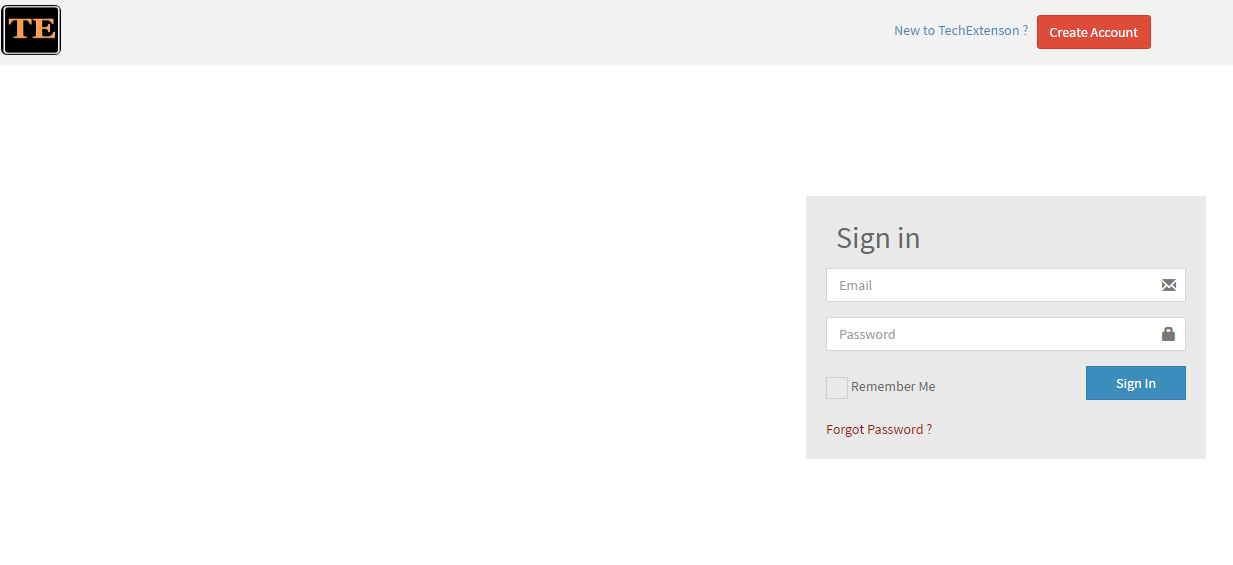
Log In after Creating account https://license.techextension.com/login.php
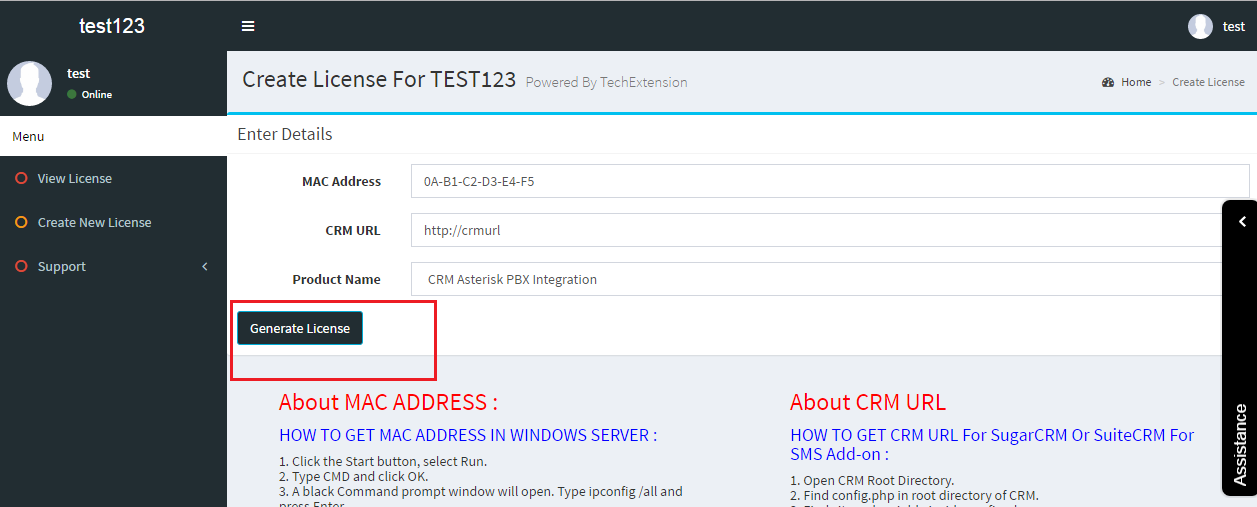
Add License

Generate License
Download module SuiteCRM Download
1. How to Install Using Module Loader
After receiving the file that you would like to install, you must first upload it to your Sugar instance. To upload a file, follow the following steps:
Step 1: Go to Admin Panel

Step 2: Navigate to Admin > Module Loader
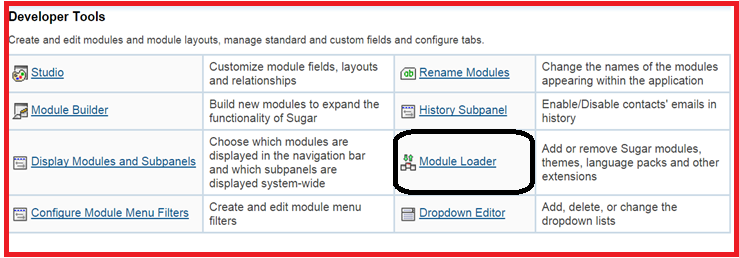
Step 3: Click the "Choose File" button in the Module Upload panel to open a file selection window from your browser.

Step 4: Select the file from your local computer.
Step 5: After you select your file, click the "Upload" button to complete the process

Step 6: After it has been uploaded, the package will show in the Uploaded Packages panel

Step 7: You will be brought to the installation screen to confirm that the packages should be installed, and to read and accept any license or read me documentation as needed. Click "Commit" when ready to run the installation.
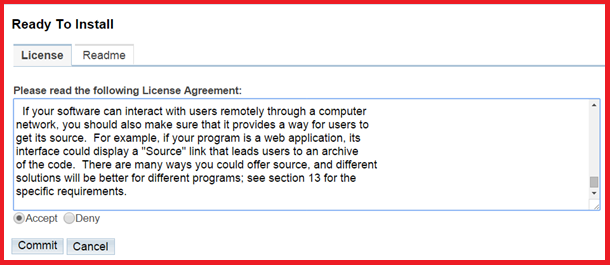
Step 8: The next page will show a progress bar and a completion notice. If there are any errors, they will be displayed with a verbose explanation of what went wrong. If not, click "Display Log" to show what happened during the installation process.
Step 9: Click Back to Module Loader when complete to return to Module Loader. If you do not need to install any further packages, you can navigate to any other section of Sugar as need be.
2. How to Activate sugarcrm Asterisk Module
After Successfully installation of Module, you need to Activate Module. Following steps describe activation process.
Step 1: Go to Admin Panel
Step 2 : Go to sugarcrm Asterisk Activation

Step 3 Fill the details And Click on update
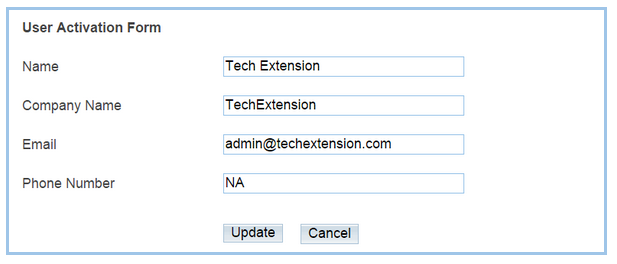
Step 4: Sent Email to support@techextension.com and ask for activation key
Step 5: Enter Activation Key.

2. Admin User Configuration
Now Access server using Putty or other ssh client and Go to techextension Folder .
(cd /custom/modules/Asterisk/AsteriskServer/AsteriskManager/ )
Edit This File AsteriskProperties.xml
<Asterisk>192.168.1.100|< /Asterisk>
< url>http://techextensionurl|< /url>
Here http://techextensionurl is same as your add-on URL If you have URL like http://192.168.1.100/techextension than URL should be http://192.168.1.100
Note : Do not remove | from ends its is used for our purpose.

Now Do configuration in switchvox server
Go to Event Triggers
Put this as your system default Url
Here http://techextensionurl is same as your add-on URL If you have URL like http://192.168.1.100/techextension than URL should be http://192.168.1.100

Now edit this clicktocall.php
this line about line number 18
$request = new SwitchvoxRequest($asterisk_ip, "admin", "password");
here admin is username of switchvox and password is password of switchvox server
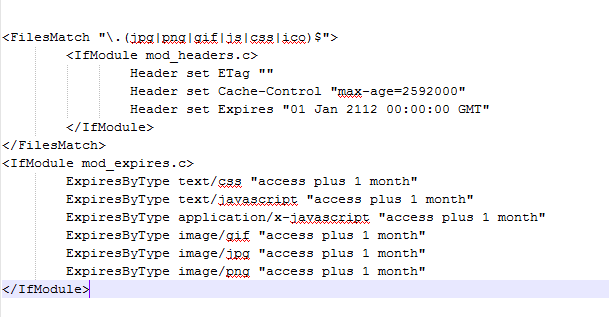
Now Check This setting .htaccess
Go to crm root Folder. Like if you have crm files on www/html/crm than crm is your root folder.
Edit .htaccess file. Remove Restriction. It should be like this.
Now Run This Command in putty .
(cd /custom/modules/Asterisk/AsteriskServer/AsteriskManager/ )
java -jar AsteriskSupport.jar
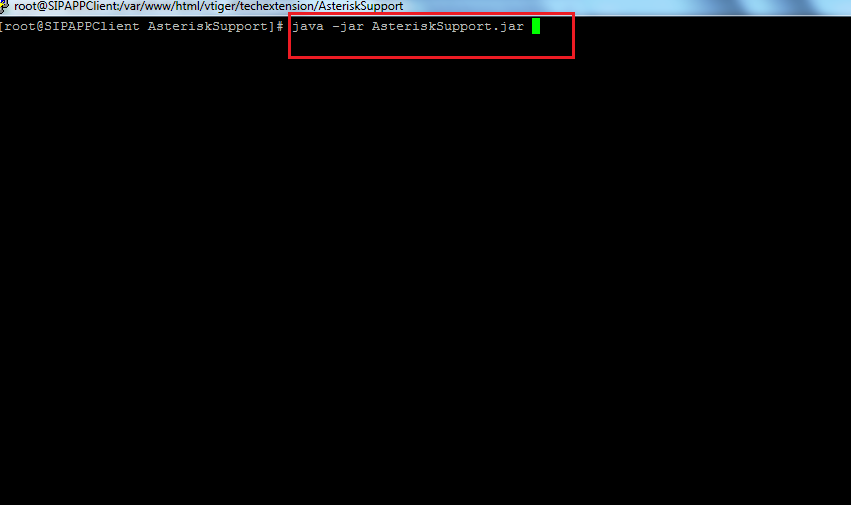
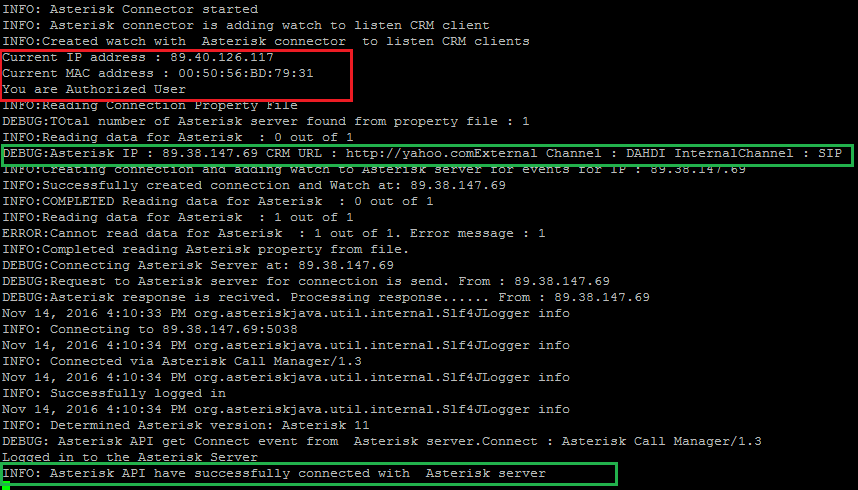
If you get Following message. It is Successfully Integrated
Download Voip File
Extract voip.zip file
Now Run This Command in putty .
pwd
It will Give you path

Put It in to voip file
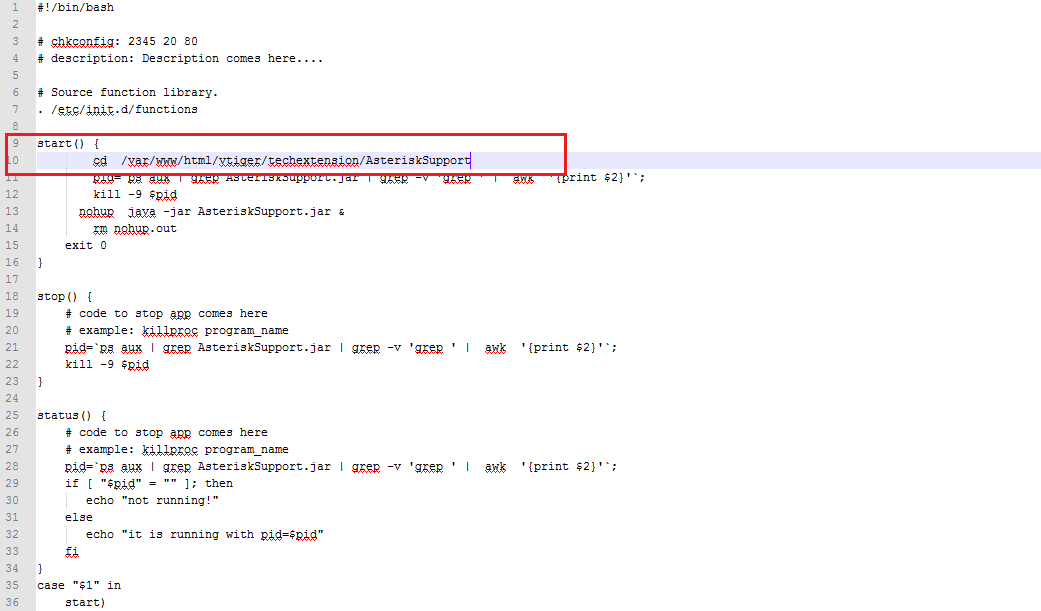
Upload voip file in to /etc/init.d/
Give voip file permission to 755
Run This Command if you have CentOS ( chkconfig voip on && chkconfig --list )
Run This Command if you have Debain OS ( update-rc.d voip defaults )
Techextension add-on command
check status: ( service voip status )
Restart : ( service voip restart )
stop: ( service voip stop )
Start : ( service voip start )
3. End User Configuration
After Successfully Admin User Configuration of Module, you need to End User setting Module. Following steps describe End User Configuration process.
Step 1 : Go to User Panel
Step 2 : Fill appropriate Details as shown here
SugarCRM Asterisk Integration Add-on User Configuration.
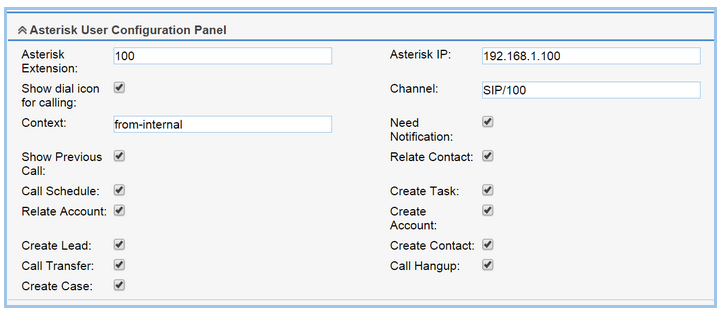
Step: 3 Save the User profile
5. How to UnInstall Using Module Loader
After a package has been installed into your Sugar instance, it can be removed if it is no longer needed. When uninstalled, the package will remove any available customizations to your instance from the file system and database.
To uninstall a package, perform the following steps:
Step 1: Navigate to Admin > Module Loader.
Step 2 : Locate the package you would like to uninstall in the Installed Packages panel.
Step 3 :Click the "Uninstall" button.
Note: If you do not see an Uninstall button next to your package, that means that it is either defined to be permanently installed or files for that package that are critical to performing the uninstall are missing from the file system.

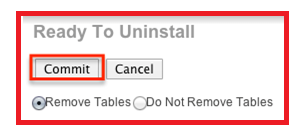
Step 4: If the package has added any database tables to your instance, you will see a selection whether to remove or retain the database tables. If the database tables include any information you would like to keep, select the "Do Not Remove Tables" option. An example of this would be if you are uninstalling a custom module, but will be reinstalling a new version of the same module. You would want to keep the data, but remove any files associated with the old module that will be replaced with the new package..
Step 5: Click "Commit" when you are ready to uninstall the package.
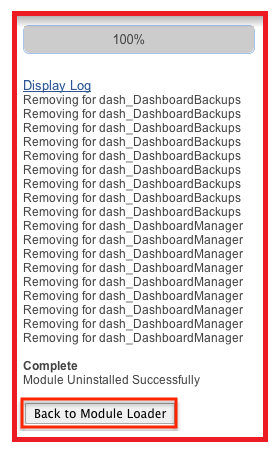
Step 6: The next page will show a progress bar and a completion notice. If there are any errors, they will be displayed with a verbose explanation of what went wrong. If not, click "Display Log" to show what happened during the uninstall process..
Step 7: Click Back to Module Loader" when complete to return to Module Loader. If you do not need to uninstall any further packages, you can navigate to any other section of Sugar as need be. .
Step 8: After the package has been uninstalled, it can be deleted from your instance via the Uploaded Packages panel.

